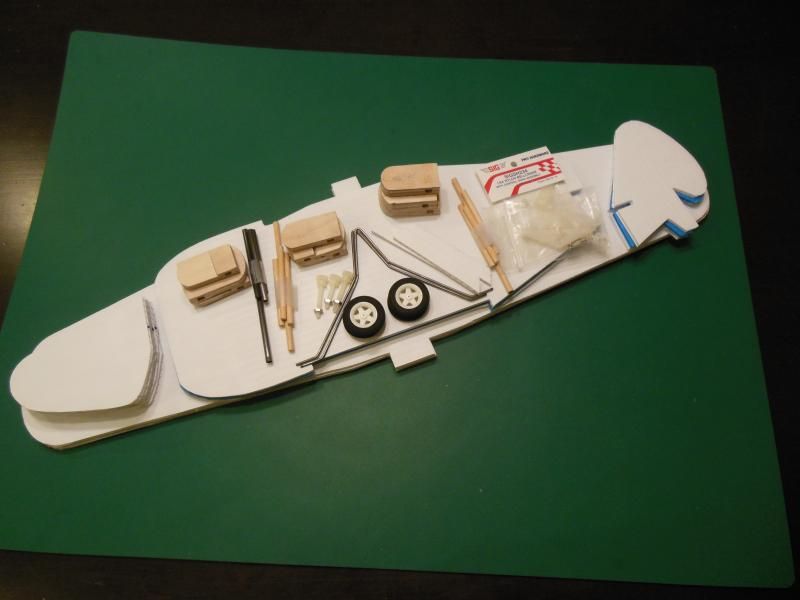
News:


  • April 17, 2024, 07:34:47 PM

Login with username, password and session length

Author Topic: My Take on Keith Morgan’s PT-19 Trainer  (Read 76305 times)

Offline Mark Mc

  • 24 supporter
  • Trade Count: (0)
  • Captain
  • *
  • Posts: 718
My Take on Keith Morgan’s PT-19 Trainer
« on: February 27, 2015, 10:54:21 PM »
Well, I had to go ahead and build Keith’s PT-19 to try it out.  But, as I dither a lot, I could not decide what engine to use.  So, I cut out enough parts to build three planes. I went to the local sign store and asked to buy some yellow, but they only have white coroplast.   I only had a little blue coroplast in my scrap pile, just enough for a fuselage and tail surfaces, so blue and white it is for one.  I chose to use blue for the fin/rudder like the early Cox PT-19s, rather than matching the wings like the later pt-19s.  The other two are all white.  Which is accurate, as Cox produced an all-white plane.  Since I couldn’t decide, I went with one plane powered by a Cox reedie, one by a front rotary, and one electric powered.  To make things easier, I decided to leave the landing gear off of the rotary valve plane.   Here are the parts I cut all stacked up and laid out:


Keith did a great job of documenting how these’re put together (
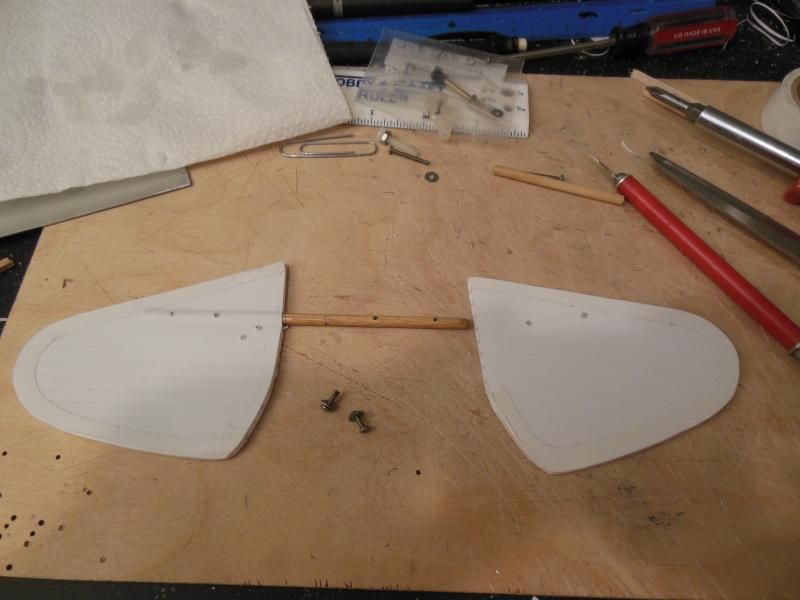
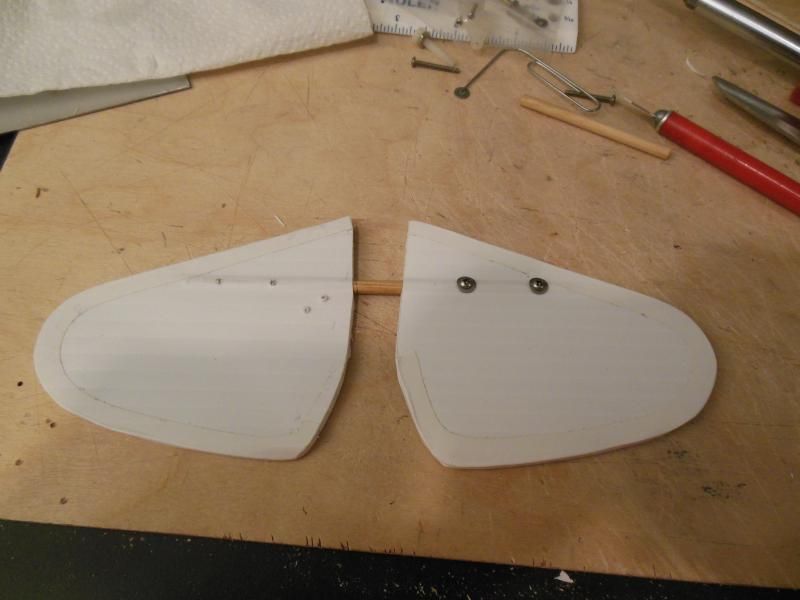
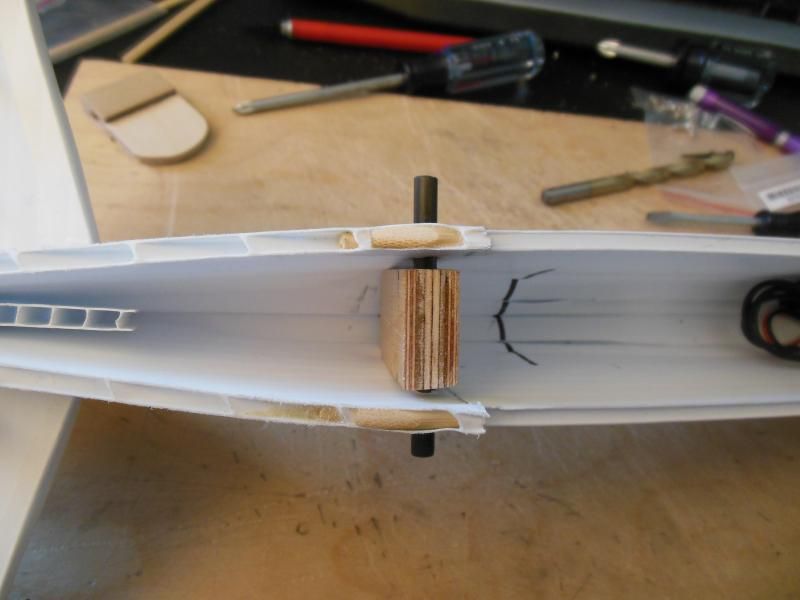
http://stunthanger.com/smf/index.php/topic,37584.0.html), so I won’t do a full build thread, as it would be redundant.  I’ll just point out the things I did differently.  First, Keith did a friction fit of his stabilators for his planes.  I like more secure attachment, so what I did was to glue the stab dowel in the left stabilator, and then drill two holes in the right stabilator for screws to keep the surfaces from rotating in flight. In the picture, there are holes drilled in both stab halves, but the left half is actually glued in place.  The two washers were put in a pair of pliers and bent to conform to the curve of the dowel through the coroplast.


The next thing I did differently was the fuselage formers.  Keith used ½” and ¾” pine.  I didn’t use that because 1) I don’t have any pine, 2) I don’t feel like braving the mess in the garage to get to my drill press, and 3) That just seems like huge chunks of wood to use for the formers.  Instead, what I did was take some scrap 1/8” and 3/32” ply to make the formers.  I sandwiched the 3/32 between the 1/8 and left holes in the middle for the dowels.  Since I was planning on a little more power than a standard Babe Bee, I decided to make a former at the leading edge of the wing also, where Keith opted not to.


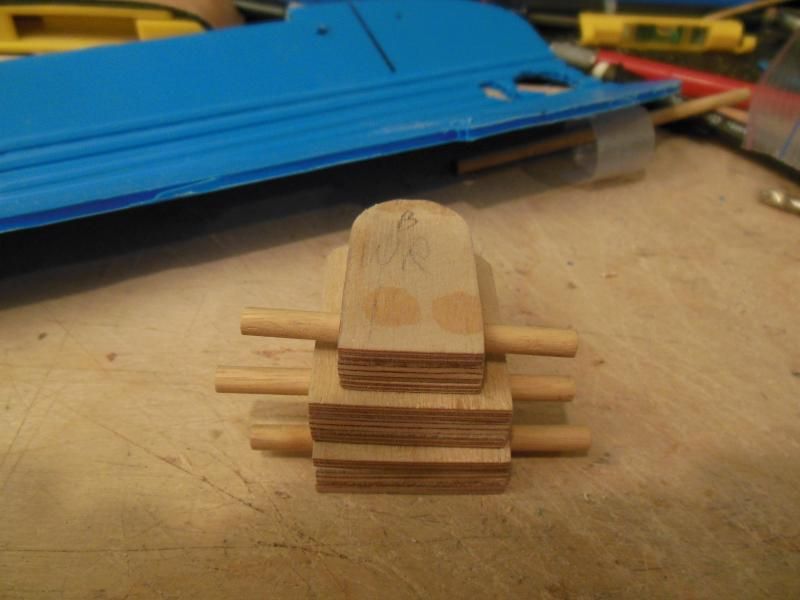
But, these still seemed like overkill, so I tried using only enough 1/8” to bracket the dowel hole.


But, you know, Keith is a pretty smart guy.  So, I’ll leave the former at the front of the wing on the rotary powered plane, but not use it on the other two.

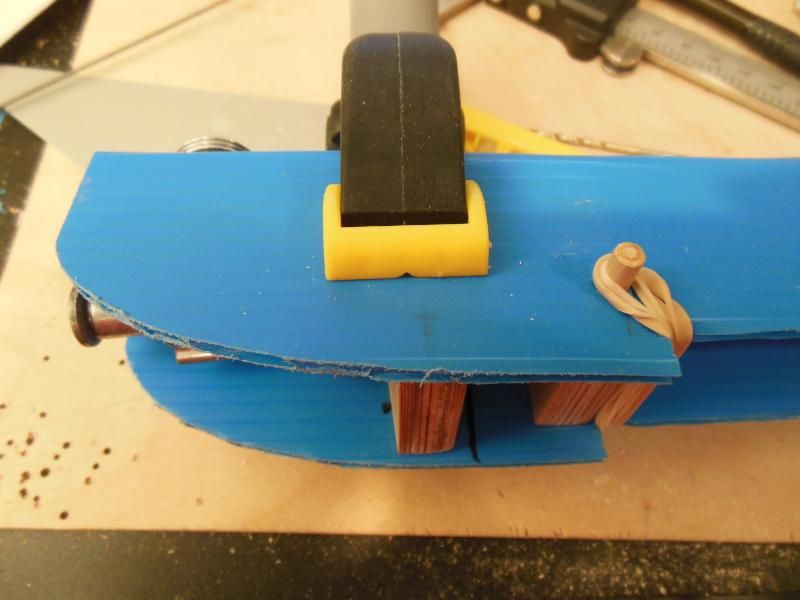
Another thing I did was to strengthen the area beneath the dowels in the coroplast.  With the rotary valve plane, I used some scrap 1/8” spruce sticks.  For the other two, I used bamboo skewers sanded to fit in the flutes of the coroplast.  To keep the screw holding the top of the firewall from tearing forward through the coroplast over time I also glued a piece of spruce stick forward of the screw hole above the firewall.


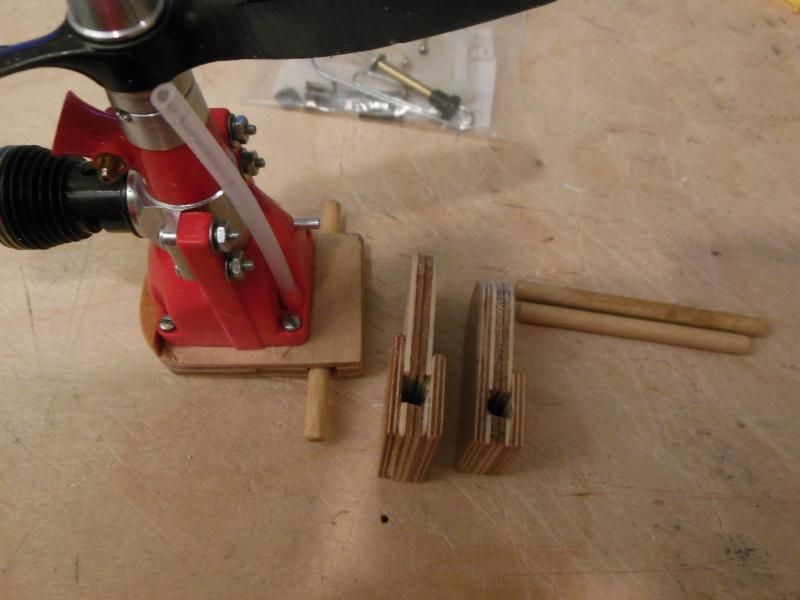
Keith has you hold the formers in place, and then stick a screwdriver through the plastic.  Here I am clamping the formers in place and making the holes for the dowels.  
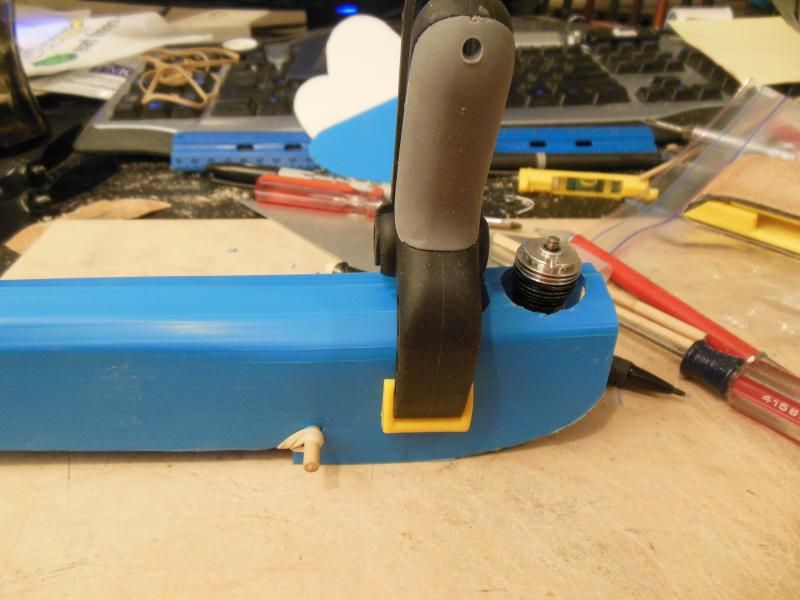


It wasn’t pretty afterwards.  For the second two planes I just measured and marked the hole locations, then drilled them out with the fuselages flat on a work surface.

Another thing I did on the glow powered planes was to cut the sides of the fuse such that the wing and the top of the fuselage were parallel.  I did the electric the way Keith’s plans show.  If I do another of these, I’ll stick to Keith’s plans, because when I cut the wing saddle parallel to the top of the fuse, it makes the engine point too far down to get the right thrust line.

Since I was going to use a more powerful rotary valve engine on one, I decided to make a carbon fiber spar for that wing.


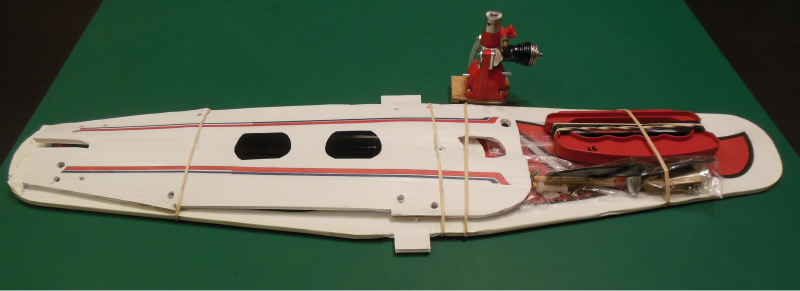
I had to go out of town to see my mother-in-law in the hospital, so I decided to quickly finish one plane so I could take it with me.  When I first saw Keith’s planes, I thought they were perfect for travelling.  Just take them apart and they made a nice flat pack.  I put the plane in my carry-on bag.  It fit perfectly and took up minimal room.  The one thing I did do to make sure there was no problem at check-in, was to ensure the pushrod was no longer than 7 inches.  I checked TSA regs on what is allowable in a carry-on, and it states that you can take screwdrivers and sharp tools so long as they are less than 7” in length.  My pushrod is exactly 7 inches.  The plane had no markings, and was bare bones, but it was fine for the purpose.  Here’s how it would look flat packed for a trip:


Unfortunately, when I went to fly the plane with some guys in Phoenix, the plane torque rolled in on the hand launch and lost line tension.  The results were non-optimal.


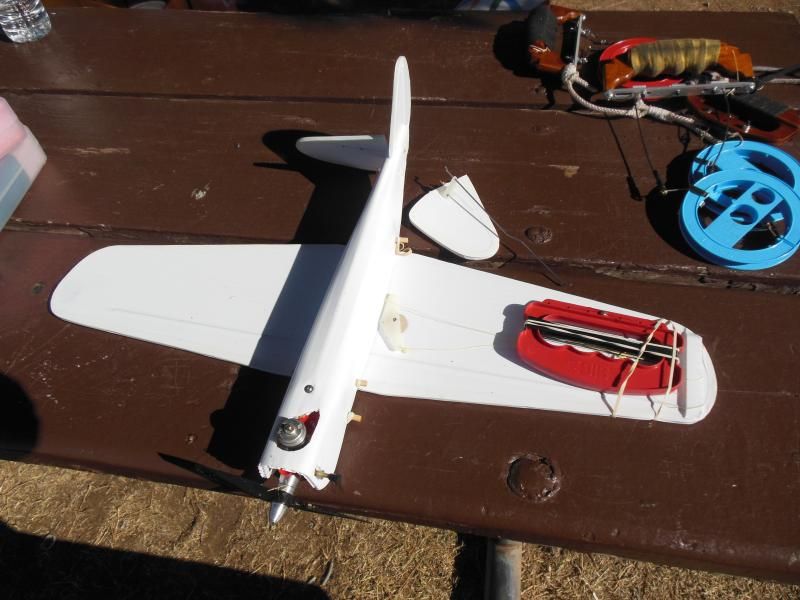
Oh, well.  I had a piece of dowel the right size, so I fixed it in a few minutes when I got home.  I’m thinking I’m going to make a set of landing gear for this one so it can R.O.G. and avoid the torque roll on launch.

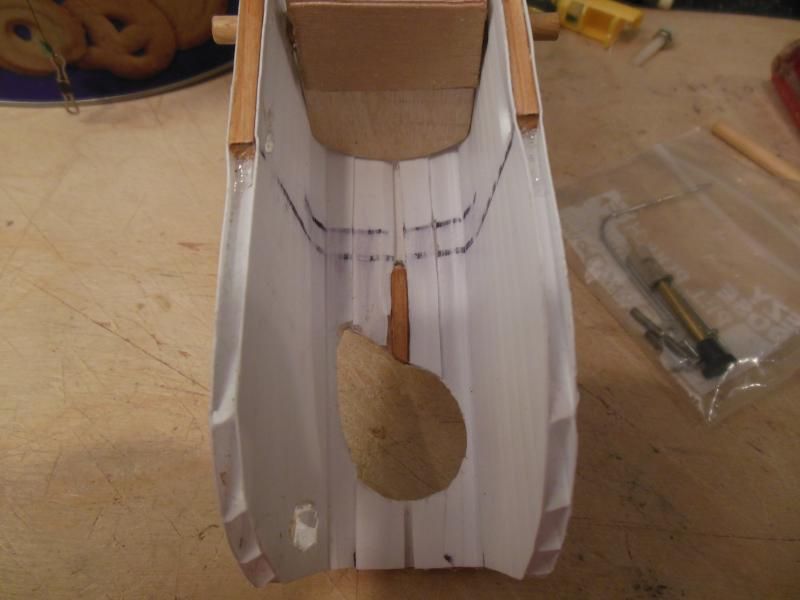
But, on to the other two planes.  After a month of attending to other things, I got back to them.  The reedie plane went together quickly, and with no issues.  The electric plane took a little longer, but it went together rather straight forward also.  I ran out of 3/32 dowel, so I used carbon fiber tube for the dowels on the electric plane.  Here’s how the electronics are tucked away for the electric.


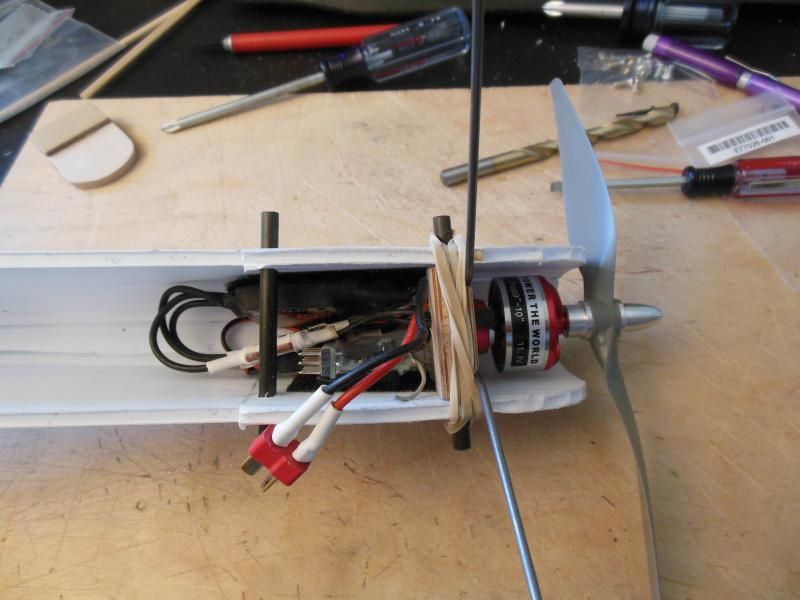
The battery goes inside, positioned to set the c.g. in the proper location.  A 3S 800 just fits between the fuselage sides.

To finish the planes off, I printed out the graphics on plain heavy paper using my HP Photosmart printer.  Then I attached them to the planes.  I used the graphs that Keith includes with his plans for the blue and white plane.  For the all-white planes, I copied a set of fuselage side and tail surface stickers I have on an unused sheet.  For the wing, I took my white Cox PT-19, and put the wing in my scanner/printer.  I scanned and then cleaned up the wing graphic, then printed it out.  After getting the graphics on the planes, I shot three coats of flat clear Lustrekote to seal them.

Tip:  If you are using plain paper for your graphics, DO NOT use 3M 77 to adhere the graphics.  It was HIGHLY unsatisfactory.  


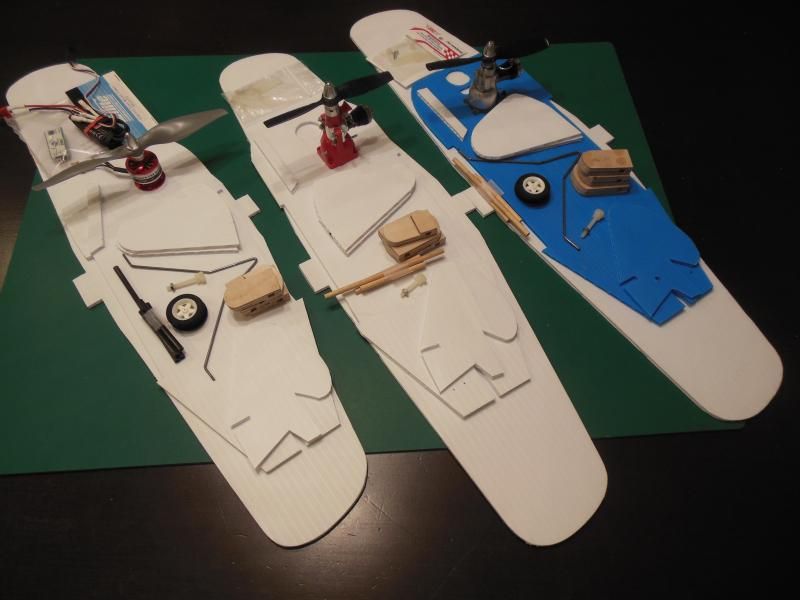
Here are the planes ready to go:


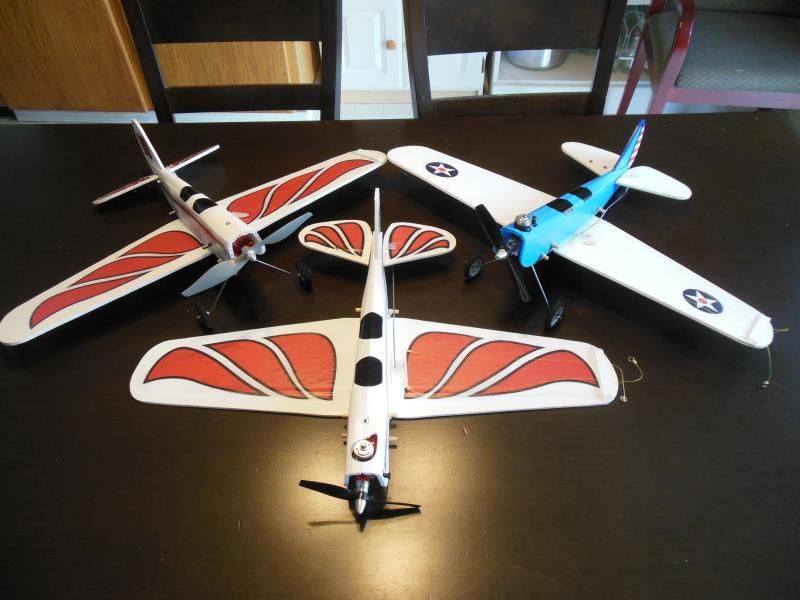
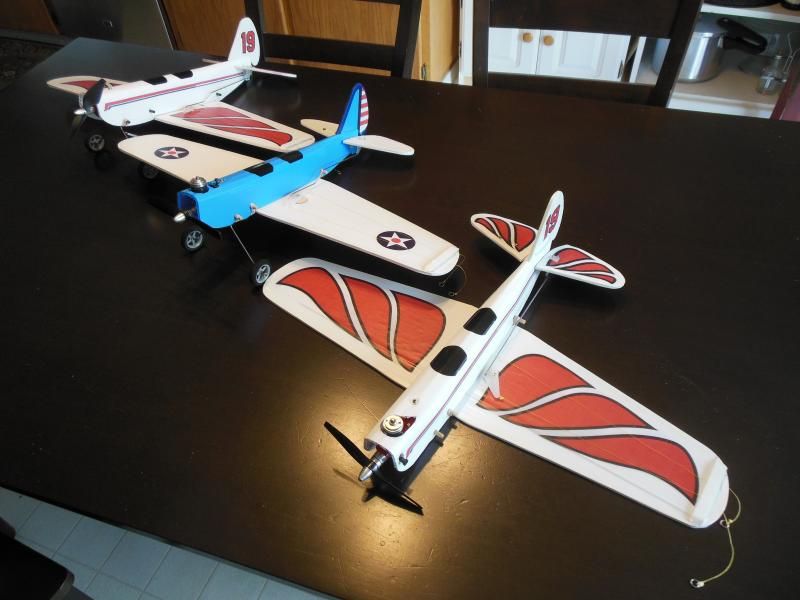
The Reedie weighs 7.65 ounces, and the rotary weighs 7.75 ounces.  Right about where Keith’s were at 7.8 ounces.  The reedie should fly fine.  The rotary should fly great with the extra oomph.  The electric?  Well, that one is the question.  It came out at 8.7 ounces without battery, 11 ounces with the 3S 800mAh battery.  The Cox version is about 10 ounces, so it’s not much heavier, and it does use a 7x4E prop.  So it may fly all right.  The glide I’m not too sure about.   We’ll see.

Mark

Offline Bill Smith

  • 21 supporter
  • Trade Count: (0)
  • Commander
  • *
  • Posts: 256
Re: My Take on Keith Morgan’s PT-19 Trainer
« Reply #1 on: February 28, 2015, 06:51:27 AM »
Nice Job. And more ideas.
I am taking notes. y1

Offline goozgog

  • Trade Count: (0)
  • Captain
  • *****
  • Posts: 551
Re: My Take on Keith Morgan’s PT-19 Trainer
« Reply #2 on: February 28, 2015, 11:15:22 AM »
Wow! The planes look great Mark!

   When I was working on this design
I never considered it as a Briefcase airplane.
Now that I've seen your "Kit" I'm going to
keep one in my car. Ya never know!

   I am a bit concerned about your plane
rolling in. Mine (Baby Bees) got a little light
on the lines at the top of the loops but it
had decent line tension.  Any chance you
forgot the nickle tip weight?

   The standard practice with Mann-Winn
trainers was to shove a length of CF rod
between the flutes to stiffen the wing.
I wanted the dihedral a'la Cox, and the wing
works well without it. No inverted stunts though
it does seem to fly reasonably upside down.

Link for Mann-Winn plans:

http://www.balsabeavers.com/information/information.php


   I am excited about your electric version.
Please please please post a flight report!

  Today it's bright and sunny and about minus 15f with
two feet of snow on the ground. I hope it melts soon.
I have airplanes that need flying.
 y1

Cheers!
Keith Morgan

Offline Mark Mc

  • 24 supporter
  • Trade Count: (0)
  • Captain
  • *
  • Posts: 718
Re: My Take on Keith Morgan’s PT-19 Trainer
« Reply #3 on: February 28, 2015, 07:45:53 PM »
Wow! The planes look great Mark!

   I am a bit concerned about your plane
rolling in. Mine (Baby Bees) got a little light
on the lines at the top of the loops but it
had decent line tension.  Any chance you
forgot the nickle tip weight?


Nope.  Didn't forget the nickle.  And it has a moderate amount of right thrust for the engine.  This is the first time this has happened to me, but I've talked to a couple of other guys who have had the torque issue on stooge or hand launches with the rotary valve 1/2A's. 


Mark

Offline Mark Mc

  • 24 supporter
  • Trade Count: (0)
  • Captain
  • *
  • Posts: 718
Maiden flight of Electric PT-19: Success and Failure
« Reply #4 on: March 06, 2015, 10:26:03 PM »
Well, I got out to do the maiden flight on my electric powered PT-19.  I flies with:
An EMAX CF2822 motor  (http://www.valuehobby.com/power-systems/brushless-motors/outrunner-airplane/emax-cf2822-outrunner.html)
A Hobbywing Skywalker speed controller (http://www.valuehobby.com/power-systems/speed-controller/airplane-heli-esc/hobbywing-skywalker-20a.html)
An electric 7x4E propeller
A GForce 3S 800mAh battery (http://www.valuehobby.com/power-systems/batteries/3s-lipo/30c-800mah-3s-jst.html)
And a generic DSM2 receiver (http://www.valuehobby.com/radio-systems-servos/receivers/dsm-compatible/r610-receiver.html)
A surplus transmitter from an eFlight Blade Force micro combat helicopter controls the plane speed.
Everything but the transmitter came from Value Hobby.

The success was that it flew great as a beginner’s plane.  Two flights were made on one pack for a total of 7 minutes.  On charge, it only took 440 mA to bring it back up to full charge, so I could have gotten a third flight with plenty of reserve left.  When I touched the motor after each flight, it was still at ambient temperature.  The battery was body temperature.  I would have made more flights, but the prop broke on the second grass landing.  This plane would do better landing on hard surfaces.  I’ll put on a prop saver tonight and hopefully get more flights in tomorrow.

The first flight went well.  It was trimmed out okay.  Flew a little right wing low, but not enough to mess with.  The speed control worked great.  Take off at full speed was nice and easy.  Throttling back made for smooth flight.  It flew well from half to full throttle.  It was controllable down to about a third throttle, but then it was getting light on the lines.  I only did roundy-roundy flight with some moderate wing-overs.  For the first flights I only put minimum throws in it.  It kept plenty of line tension with full throttle, so it should do good loops if the throw is increased.  Landing was okay.  I may need to move the battery back about a quarter of an inch to get an optimum glide.  The failure, and only irritating thing of the flight was that on landing, the left wheel broke.  The spokes snapped off.  I guess I’ll have to find light weight wheels with better spokes.


For the second flight, I let my son fly it.  He’s had 8 or 10 flights over the last two years, so I’d still consider him a novice.  Even with no wheel, the plane took off from my coroplast runway fine.  After take-off, I throttle back for him and let him fly it nice and slow at a pace he found comfortable.  Having the transmitter in my hand made it easy to control how fast he flew.  After he gets more handle time, I’ll let him do the throttle control.  My son flew it out for three minutes with no trouble, and then brought it in for a landing.  For some reason, I still can’t get my son to grasp the concept of the flare.  That’s where the broken prop came.  He liked it very much, and now wants me to convert his SIG Skyray that he doesn’t fly to electric. He likes the sound and smell of castor, but doesn’t like the mess or fiddling with an engine  :/

Here are the videos of today’s flights.

First Flight:


Second Flight:


I think on my next mail order I will get a couple of smaller batteries and see how it flies weighing a little less.  Over all, I think it was a success.  But, the one thing I can say is, it just doesn’t sound like a real plane should.  And it most certainly doesn’t SMELL like a plane should.

So, in summary:  The plane actually does what it sets out to do.  Fly like the venerable Cox PT-19.  Smooth and easy so that any novice can learn to fly Control Line on it.

Mark

Offline goozgog

  • Trade Count: (0)
  • Captain
  • *****
  • Posts: 551
Re: My Take on Keith Morgan’s PT-19 Trainer
« Reply #5 on: March 08, 2015, 06:00:49 AM »
EXCELLENT!

    I'm very happy that it flew with a minimum of fiddling.
If it flies "off the drawing board", then it's fulfilling the
role of the Cox PT-19.

"So, in summary:  The plane actually does what
it sets out to do.  Fly like the venerable Cox PT-19.
Smooth and easy so that any novice can learn to fly
Control Line on it."


   Thanks Mark, That made it worthwhile. y1


  I really enjoyed hearing you throttle up and slow down.
I was looking to see how it did with low power.
Not too bad.
  You're far more patient than I am. I would have done
something stupid and attempted a loop. But, then again,
I wasn't there.

Love looking at the green grass!

p.s. Free plans are available for everyone.
« Last Edit: March 08, 2015, 04:07:03 PM by goozgog »
Keith Morgan

Offline Phillip Kenney

  • Trade Count: (0)
  • Lieutenant
  • ***
  • Posts: 116
Re: My Take on Keith Morgan’s PT-19 Trainer
« Reply #6 on: March 08, 2015, 11:30:09 AM »
Keith, I've downloaded the pdf's you had listed in your original build thread, are the fre plans you mentioned the same or have you updated them from the last version on the original thread. If they are different please send me a set, if not I've already tiled and printed the original plans.

Offline Mark Mc

  • 24 supporter
  • Trade Count: (0)
  • Captain
  • *
  • Posts: 718
Re: My Take on Keith Morgan’s PT-19 Trainer
« Reply #7 on: March 08, 2015, 01:55:28 PM »

  I really enjoyed hearing you throttle up and slow down.
I was looking to see how it did with low power.
Not too bad.

Keith,  it flies pretty well on low power.  When I get down to about 1/3 throttle it starts to wallow a bit, and I'd not do it in more than a light breeze.  At 1/3 throttle, it was doing 6 second laps on 37' lines.


p.s.  Free plans are available for everyone.

Offline goozgog

  • Trade Count: (0)
  • Captain
  • *****
  • Posts: 551
Re: My Take on Keith Morgan’s PT-19 Trainer
« Reply #8 on: March 08, 2015, 04:09:31 PM »
Hello Phillip,
                 The plans posted here on Stunthanger
are not full size.
I have sent you the real ones via email.
Let me know if you don't receive them.

If you build one, let us know how it went. y1


Cheers!
Keith Morgan

Offline Chancey Chorney

  • Trade Count: (0)
  • Captain
  • *****
  • Posts: 621
Re: My Take on Keith Morgan’s PT-19 Trainer
« Reply #9 on: November 24, 2015, 03:00:32 PM »
Hi there. I was just wondering if you could please send me a copy of the plans?  Thank you. ;D

Offline Ken Burdick

  • Trade Count: (0)
  • Captain
  • *****
  • Posts: 600
Re: My Take on Keith Morgan’s PT-19 Trainer
« Reply #10 on: November 24, 2015, 03:14:58 PM »
Dude....
this is a job for Pat Johnson! What a great idea. Me thinks it should be a full size stunter........

Offline Chancey Chorney

  • Trade Count: (0)
  • Captain
  • *****
  • Posts: 621
Re: My Take on Keith Morgan’s PT-19 Trainer
« Reply #11 on: November 26, 2015, 07:55:43 PM »
Yet another PT-19 replica build from Keith Morgans plans. One of the main problems was that I had drilled the elevator rod hole a bit crooked, so I 'massaged' it straight in the coroplast. Asides from this, it went well, and am hoping it will still fly. AUW will be at or around 7 oz. As it sits with a Babe Bee on it, it is at 6.75 oz. All I need are to install lines and a control rod. As I have a bunch of the white stuff here on the ground, it will be a while till I will fly it. Anyways, here are a few pictures for your enjoyment/entertainment.


Offline Chancey Chorney

  • Trade Count: (0)
  • Captain
  • *****
  • Posts: 621
Re: My Take on Keith Morgan’s PT-19 Trainer
« Reply #12 on: November 26, 2015, 07:57:16 PM »
Having problems with pictures today. Trying this again.

Offline john e. holliday

  • 24 supporter
  • Trade Count: (0)
  • Admiral
  • *
  • Posts: 22769
Re: My Take on Keith Morgan’s PT-19 Trainer
« Reply #13 on: November 27, 2015, 11:20:15 AM »
Looks good.
John E. "DOC" Holliday
10421 West 56th Terrace
Shawnee, KANSAS  66203
AMA 23530  Have fun as I have and I am still breaking a record.

Offline Mark Mc

  • 24 supporter
  • Trade Count: (0)
  • Captain
  • *
  • Posts: 718
Re: My Take on Keith Morgan’s PT-19 Trainer
« Reply #14 on: November 27, 2015, 11:01:06 PM »
Looking good.  Since it's so colorful, it should show up great against the snow.  Why not make up some skis and give ti a try?   ;D


Advertise Here
Tags:


Advertise Here